The Old Neighborhood: Difference between revisions
No edit summary |
Sneaky pete (talk | contribs) No edit summary |
||
| (9 intermediate revisions by 2 users not shown) | |||
| Line 1: | Line 1: | ||
{{Mission Infobox | {{Mission Infobox | ||
|Image = | |Image = Starfield_TheOldNeighborhood3_EN.jpg | ||
|Name = The Old Neighborhood | |Name = The Old Neighborhood | ||
|Type = Main Mission | |Type = Main Mission | ||
|Number = 2 | |Number = 2 | ||
|Level = | |Level = | ||
|Requirement = | |Requirement = | ||
|Location = [[ | |Location = [[the Lodge]] | ||
|Starting NPC = Sarah Morgan | |Starting NPC = Sarah Morgan | ||
|Description = Sarah wanted to talk to me about my first mission. | |Description = Sarah wanted to talk to me about my first mission. "We need to find Vanguard Moara, who might be in possession of an Artifact. He was last seen patrolling the Sol System." | ||
|Reward = 400 XP, 8000 Credits, Constellation Space Suit, Constellation Space Helmet, Sarah Morgan | |Reward = 400 [[XP]], 8000 [[Credits]], [[Constellation Space Suit]], [[Constellation Space Helmet]], [[Sarah Morgan]] as [[Companion]] | ||
|Achievement = | |Achievement = | ||
|Previous = One Small Step | |Previous = One Small Step | ||
|Next = The Empty Nest | |Next = The Empty Nest, Into the Unknown, Back to Vectera | ||
|Patch = 1.0 | |Patch = 1.0 | ||
}} | }} | ||
==Walkthrough== | ==Walkthrough== | ||
In the mission "The Old Neighborhood," you start by equipping your [[character]] and reviewing your [[skills]]. You then approach [[Sarah Morgan]], who is standing beside the [[artifact]] pedestal in [[the Lodge]]. If you're ready to embark on the [[mission]], talk to her. She'll join your party, becoming a permanent member until the mission's end. While still at the Lodge, don't forget to grab the [[Constellation Guide 01]] [[magazine]] from the railing for a permanent buff. | |||
Your first objective is to talk to Sarah's contact, [[Commander John Tuala]]. Exit the Lodge and follow your in-game map to locate him. During the conversation, you'll have the option to join the [[UC Vanguard]]; the choice is yours. | |||
Upon obtaining new information from [[Commander Tuala]], you're instructed to travel to [[Cydonia]] on [[Mars]]. Use the [[Starmap]] to locate Mars in the [[Sol]] [[system]] and initiate the jump. Once you arrive, land in Cydonia and navigate your way to the mining colony. Inside, take a right turn to find the [[Broken Spear]] bar. Speak with [[Jack]], your new contact. Through a Companion-specific dialogue option, you can use Sarah to call out Jack's dishonesty, dropping his asking price for information from 2500 Credits to a mere 1000. He also directs you to the [[Mission Board]] for extra jobs, if you're interested. | |||
Armed with new information, set course for [[Venus]], also located in the Sol system. Upon arrival, Sarah will alert you to [[hostile]] ships nearby. Best heed her advice and avoid them. Then, set your ship systems to level 0, except for the engines which should be at 2, and carefully approach the satellite to interact with it. | |||
Your next destination is the [[Nova Galactic Staryard]], orbiting [[Earth]]'s [[moon]]. Once you arrive, Sarah will brief you on the significance of the Staryard. Approach the docking point and hold "/R" to dock automatically. | |||
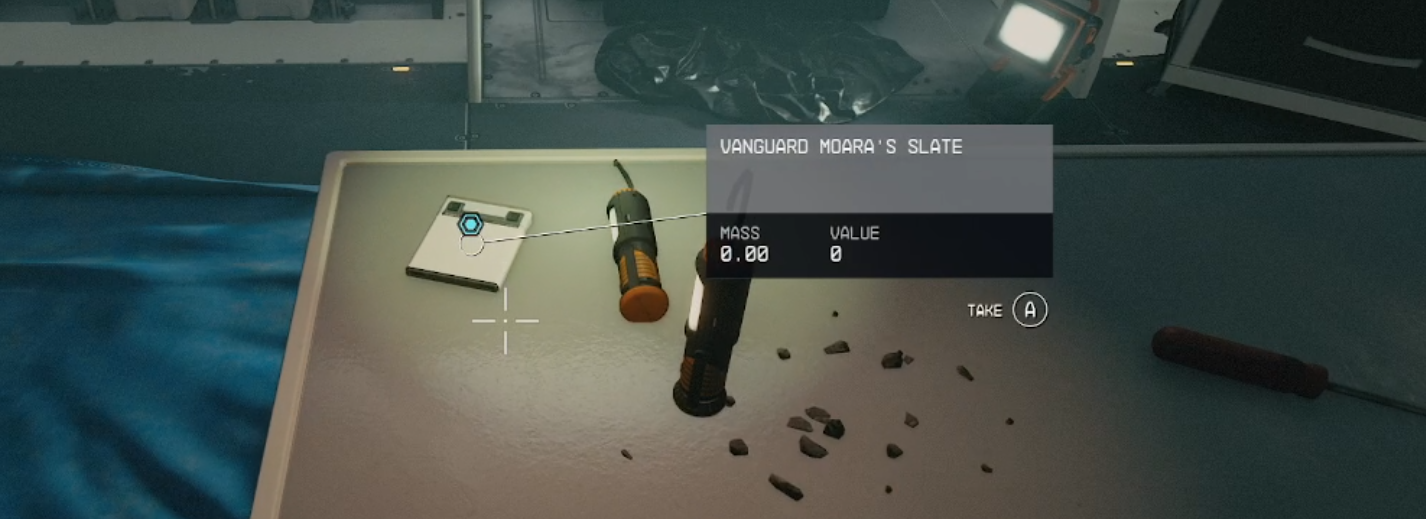
Once inside, explore cautiously. There are more hostiles here than in the previous mission. Watch for a large room labeled "Conference Room" where two factions, the [[Spacers]] and Eciptics, are in a firefight. A Search and Rescue key leading to loot is found here. Continue toward the objective until you reach a room with a staircase; here you'll find another magazine, the Nova Galactic Manual 02. Secure it and proceed into the objective room, dealing with any opposition. Inside the white structure, you'll find [[Vanguard Moara]]'s Slate on a bench. | |||
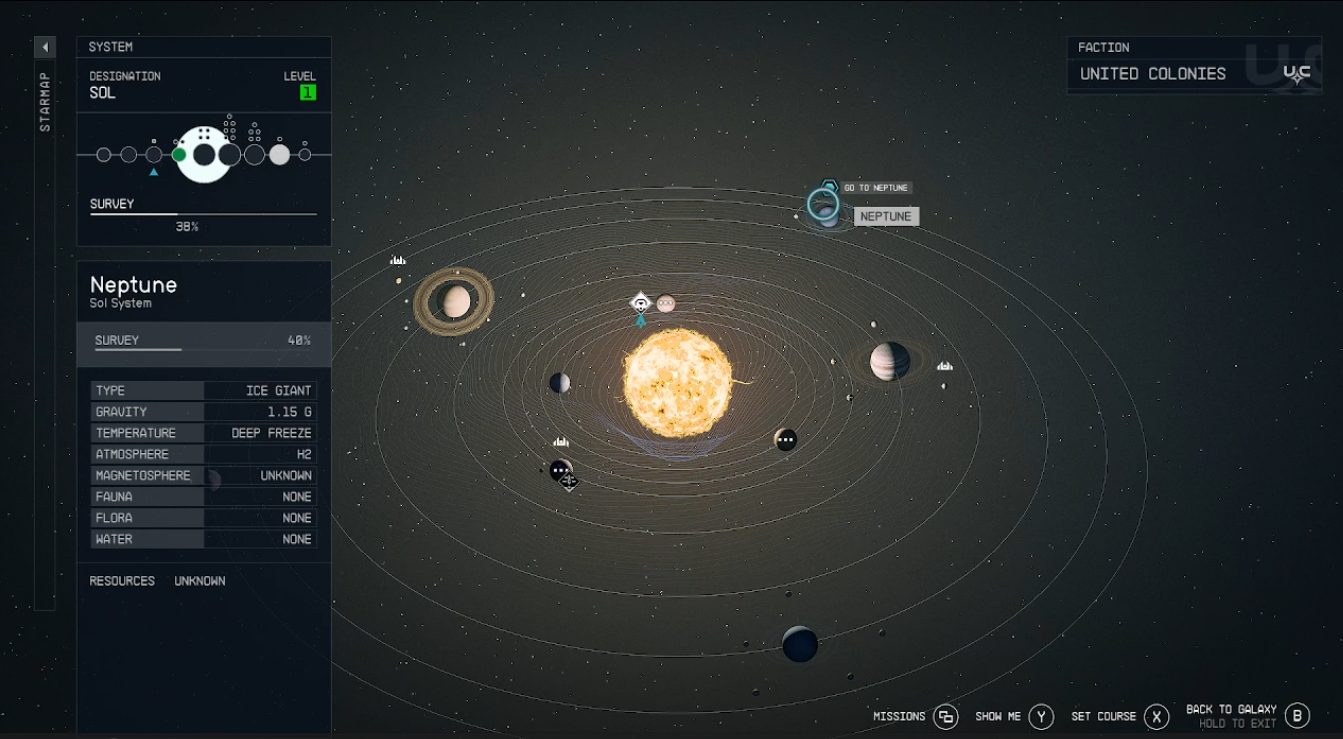
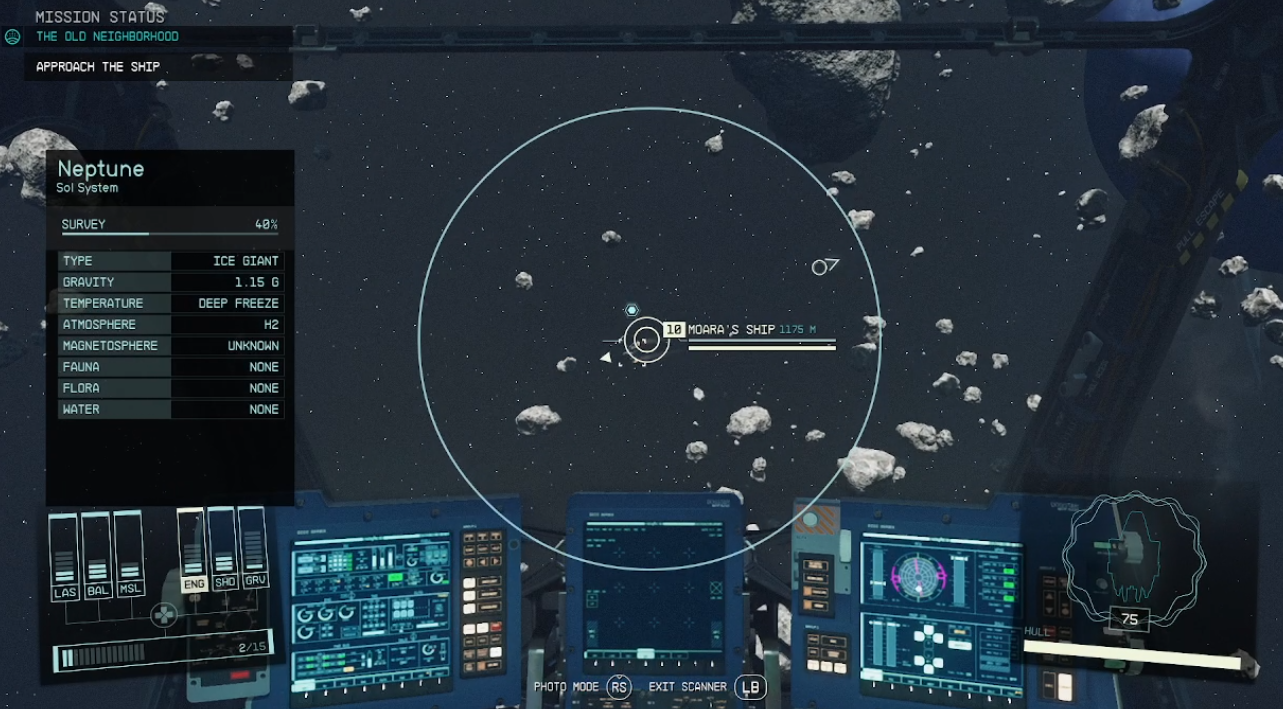
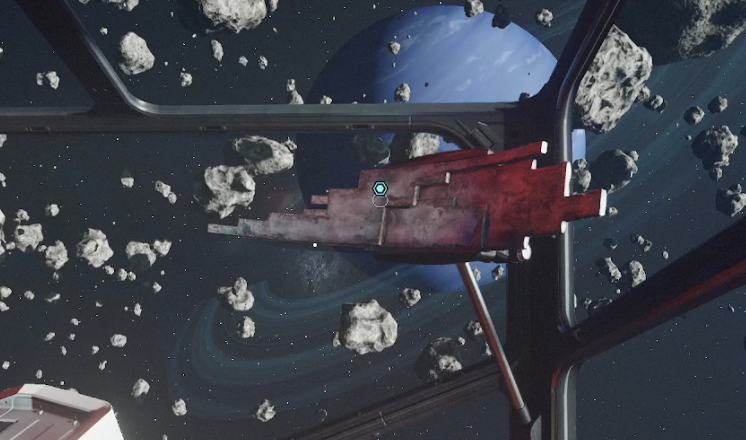
After gathering all the intel, it's time to head to Neptune. Once back in space, locate Neptune in the Sol system and jump. Once you arrive, Moara's ship will be visible nearby. However, as you approach, the ship turns hostile. Navigate evasively while dialogue ensues. You'll need to disable the ship by taking down its shields with your laser [[weapon]] and then hitting it with your ballistic weapon. Get close enough, and you can dock with Moara's ship. | |||
Prepare for combat as you board Moara's ship. After clearing out the [[enemies]], loot the [[cockpit]] key from the last one. Then proceed to the cockpit to talk to Moara and understand the situation. You'll find an artifact at the front right of the cockpit—take it. | |||
Return to the Lodge on [[Jemison]], docking and adding the artifact to the pedestal. Wait for Sarah to consult with [[Noel]] about the artifact pieces. Finally, talk to Sarah one last time to complete the mission. With that, you're one step closer to unraveling the game's mysteries. | |||
==Tips and Tricks== | |||
*Highly advise doing [[Into the Unknown]] before doing [[Back to Vectera]] and [[Empty Nest]]. | |||
*You can use [[Sarah]] to carry items for you throughout the [[mission]] to help with how much you can carry. | |||
*There are several areas in this [[mission]] where you will be attacked. Make sure to keep your health up and restore your [[shields]] on your [[ship]]. | |||
*Don't forget to Undock/[[Dock]] your [[ship]] when you want to leave or you won't be able to fast travel. | |||
*You will obtain your first [[Constellation]] [[Companion]] in this [[mission]] | |||
==Objectives== | ==Objectives== | ||
=== | ===Talk to Sarah=== | ||
[[File:Starfield_TheOldNeighborhood3_EN.jpg|400px]] | |||
*Go into [[the Lodge]] in [[New Atlantis]]. | |||
*Talk to [[Sarah]] to get your next step. | |||
*Select "I'm ready" to continue the quest. | |||
===Talk to Sarah's Contact=== | |||
[[File:Starfield_TheOldNeighborhood2_EN.jpg|400px]] | |||
*Follow the quest marker to [[the Vanguard]]. | |||
*Speak with [[Tuala]]. | |||
===Ask about Moara in Cydonia=== | |||
[[File:Starfield_TheOldNeighborhood7_EN.jpg|400px]] | |||
*Return to your [[ship]] and travel to [[Sol]]. | |||
*Travel to [[Cydonia]]. | |||
*Follow the quest marker to a bar, make sure to turn right at the 4 way intersecting hall. | |||
*Talk to the [[bartende]]r. | |||
*[[Moara]] owes a tab at the bar. You can either pay the tab or [[persuade]] the [[bartende]]r to not need that to give you the information. | |||
===Go to Venus=== | |||
[[File:Starfield_TheOldNeighbhoodGotoVenusQObj_EN.png|400px]] | |||
*Open the Mission log and select "Set Course" and select the "[[Sol]]" System and travel to [[Venus]]. | |||
**You may need to jump to a closer location before jumping to Venus. | |||
[[File:Starfield_OldNeighborhoodGotoVenus_EN.PNG|400px]] | |||
===Talk to Sarah=== | |||
*When you arrive at [[Venus]], [[Sarah]] will talk to you about how you need to get to [[the Satellite]] to get information. | |||
===Examine the Satellite=== | |||
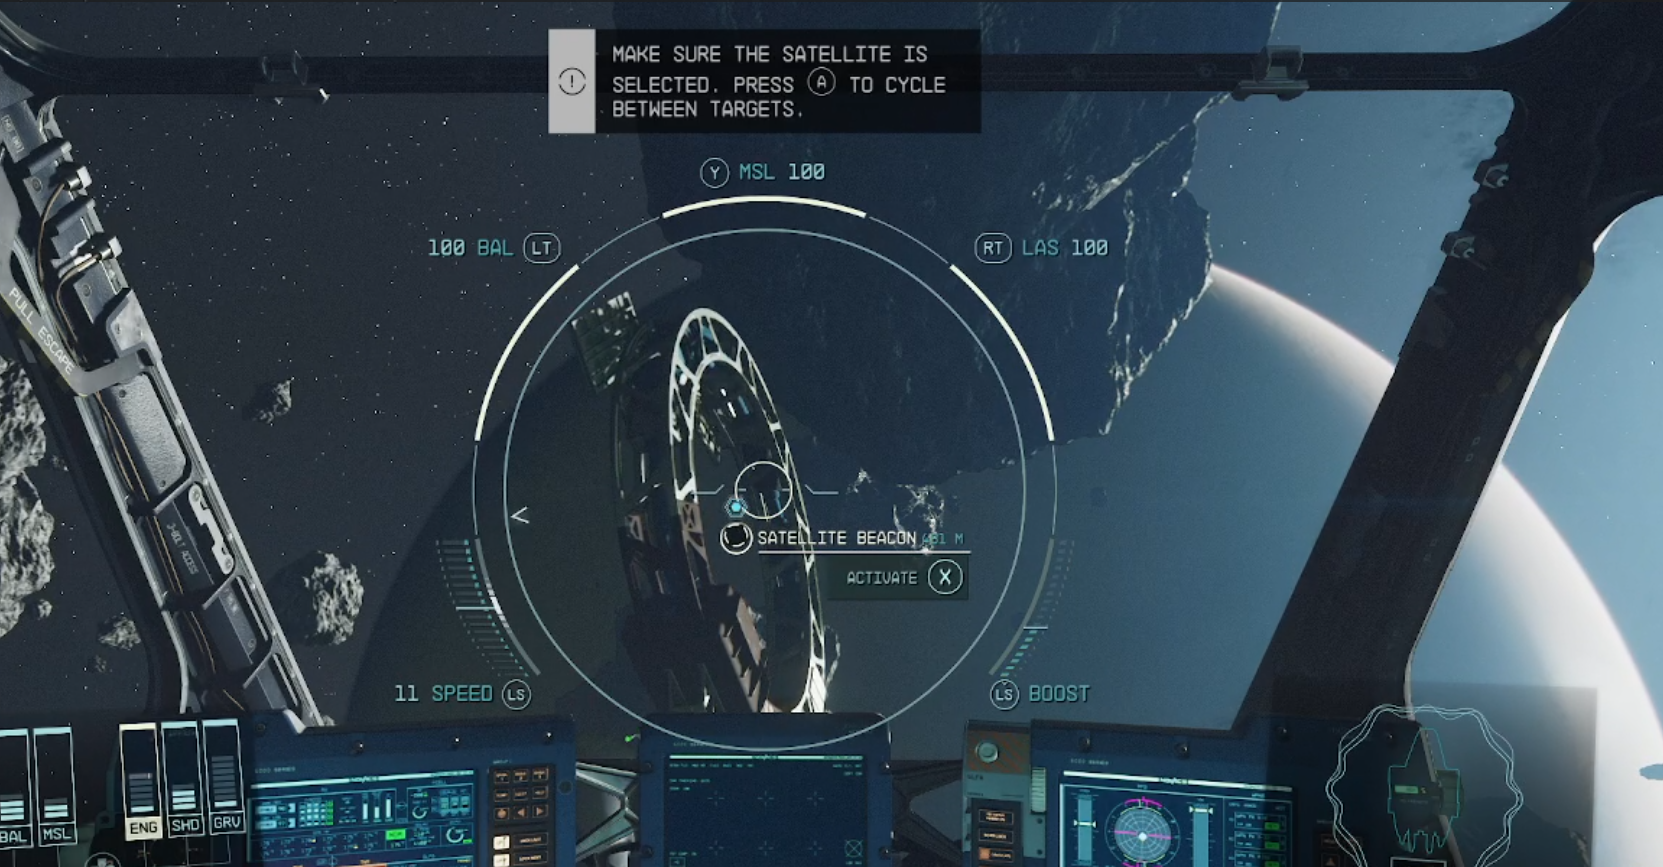
*Optional: Use Minimal [[Power]] to Avoid Detection. | |||
**If you choose this option, turn all [[system]]s down except one or two bars for your [[Engines]] and stay far away from the enemy [[ship]]s. Get within 500m of [[the Satellite]] Beacon to activate it. | |||
[[File:Starfield_TheOldNeighbhoodExamineSatellite1_EN.PNG|400px]] | |||
*If you choose to not do the optional method, fight off the [[Va'ruun Hymn]] [[ship]]s. Once once they are destroyed, go to [[the Satellite]] Beacon to activate it. | |||
[[File:Starfield_TheOldNeighbhoodActivateSatellite_EN.PNg|400px]] | |||
===Go to Nova Galactic Staryard=== | |||
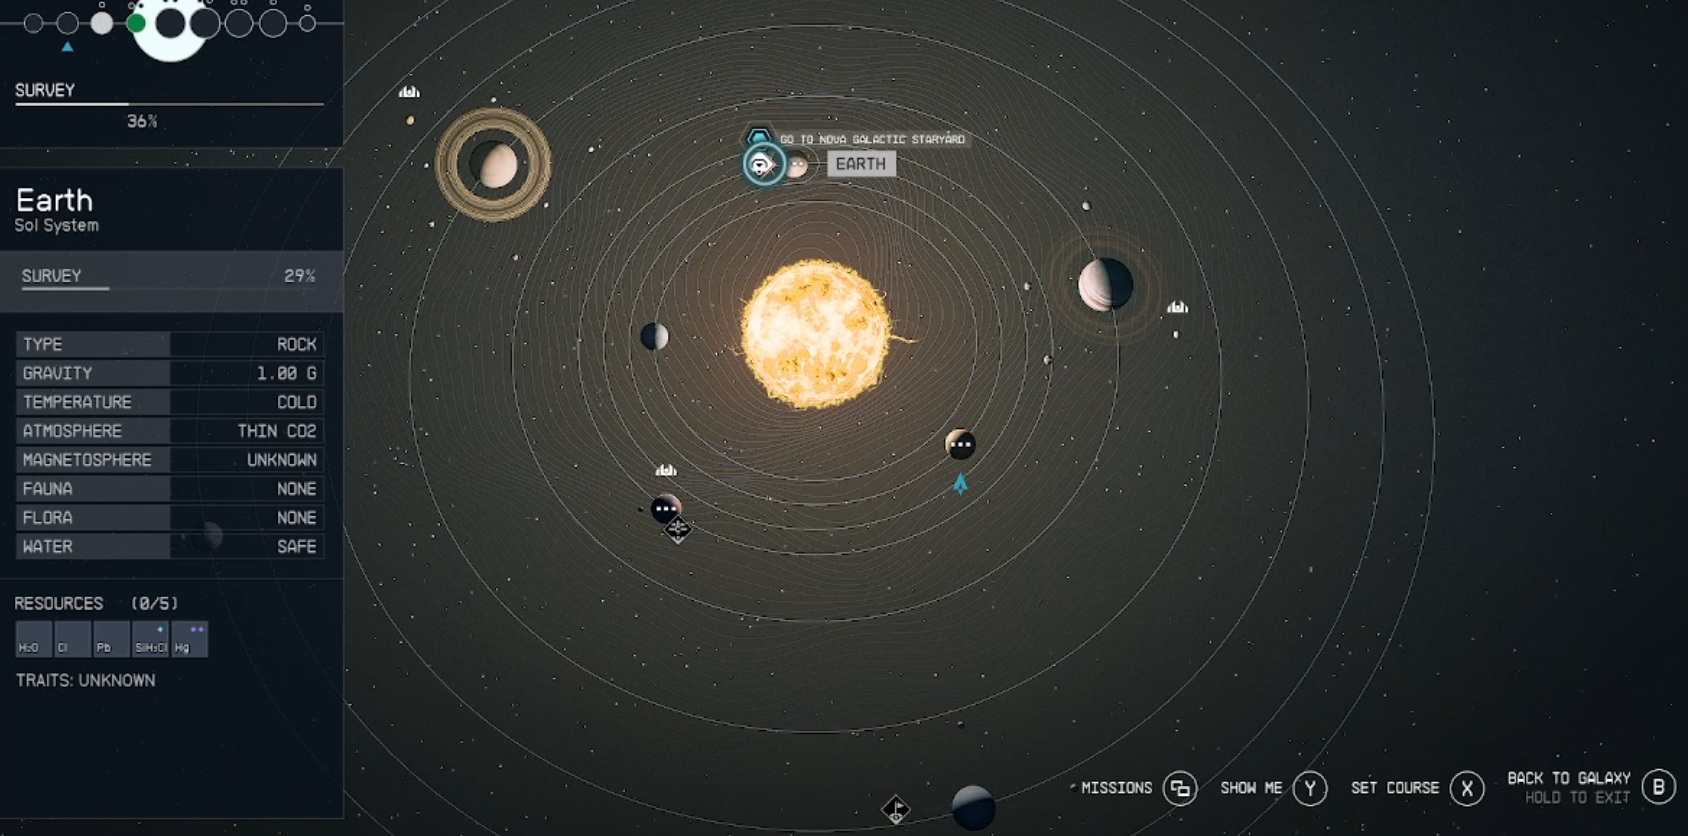
*The [[Satellite Beacon]] will relay the message that [[Moara Otero]] has headed to the [[Nova Galactic Staryard]] orbiting [[Earth]]'s [[Moon]]. | |||
*Open your Mission log and "Travel" to [[Earth]]. | |||
[[File:Starfield_TheOldNeighbhoodGotoNovaGalacticShipyard_EN.png|400px]] | |||
===Talk to Sarah=== | |||
*[[Sarah]] will tell you about [[Earth]]'s history and you want to select "Let's see if [[Vanguard Moara]] is in that staryard" | |||
*[[Sarah]] will prompt you to dock with the [[Nova Galactic Staryard]] | |||
===Dock with Nova Galactic Staryard=== | |||
*[[Dock]] your space[[ship]] with the [[Nova Galactic Staryard]] | |||
[[File:Starfield_TheOldNeighbhoodDockingTT_EN.PNG|400px]] | |||
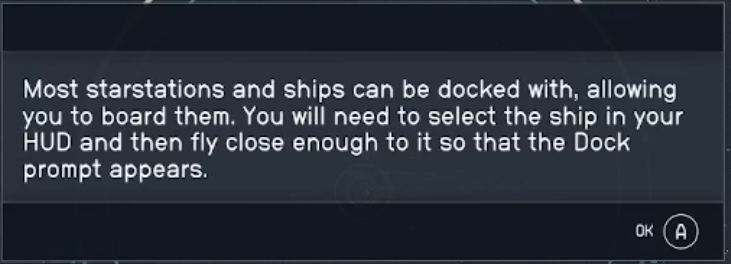
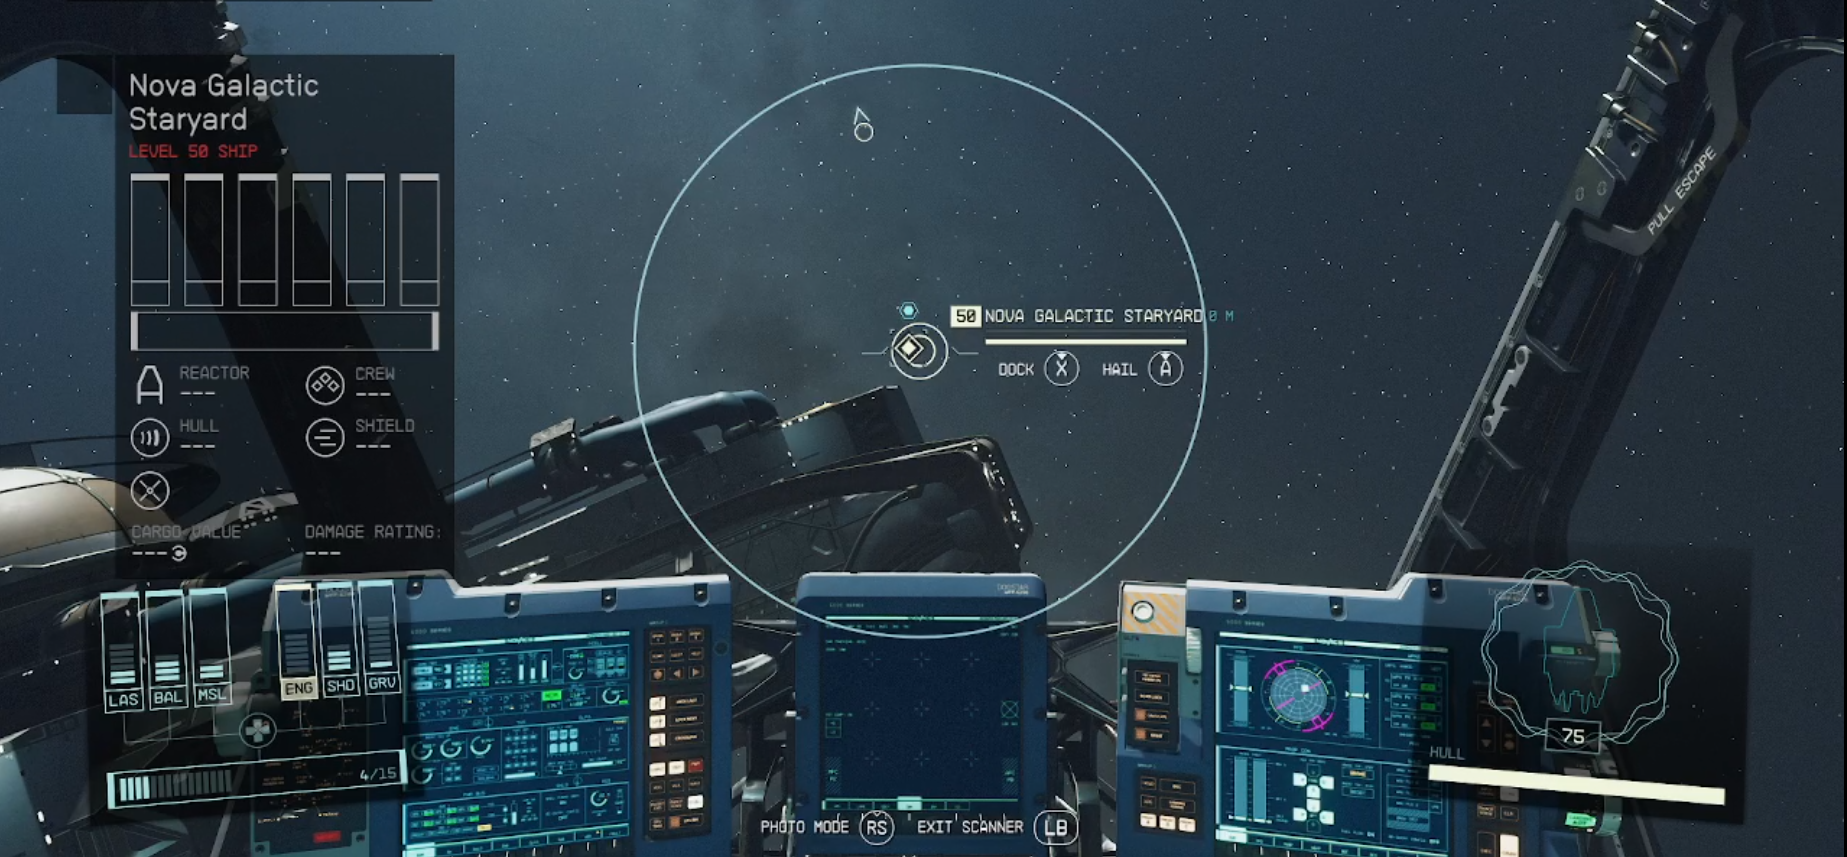
*To [[Dock]]: hover over the white diamond and enter your [[Scanner]] and when prompted, choose the "DOCK" option. | |||
[[File:Starfield_TheOldNeighbhoodDockingScreen_EN..png|400px]] | |||
*Exit your [[ship]] and go through the next room and open the door for the "[[Nova Galactic Staryard]]" | |||
===Find any clues about Moara=== | |||
*If you get lost, open your scanner and look for the white arrows that will point you in the direction you are supposed to go. | |||
**Note: Sometimes, these will not show if you are in certain areas. | |||
*This next area is full of [[enemies]] that you can kill or stealth past. ([[Spacers]], [[Ecliptics]]) | |||
*Follow the marker until you get to a room with a table that has [[Vanguard Moara]]'s Slate on it. | |||
[[File:Starfield_TheOldNeighbhoodMoarasSlate_EN.png|400px]] | |||
*Listen/Read [[the Vanguard]] [[Moara]]'s Slate | |||
[[File:Starfield_TheOldNeighbhoodMoarasSlate2_EN.png|400px]] | |||
===Go to Neptune=== | |||
*Before you are able to travel to Neptune, make sure to undock from the [[Nova Galactic Staryard]]. | |||
*[[Fast Travel]] to Neptune and [[Sarah]] will mention that there is a [[ship]] drifting. | |||
[[File:Starfield_TheOldNeighborhoodNeptuneMap_EN.PNG|400px]] | |||
===Approach the Ship=== | |||
*Start traveling towards "[[Moara]]'s [[Ship]]." You may need to add or decrease power to your [[Engines]]. | |||
[[File:Starfield_OldNeighborhoodApproachShip_EN.PNG|400px]] | |||
*As you approach the [[ship]], it will turn [[hostile]]. Shoot it. | |||
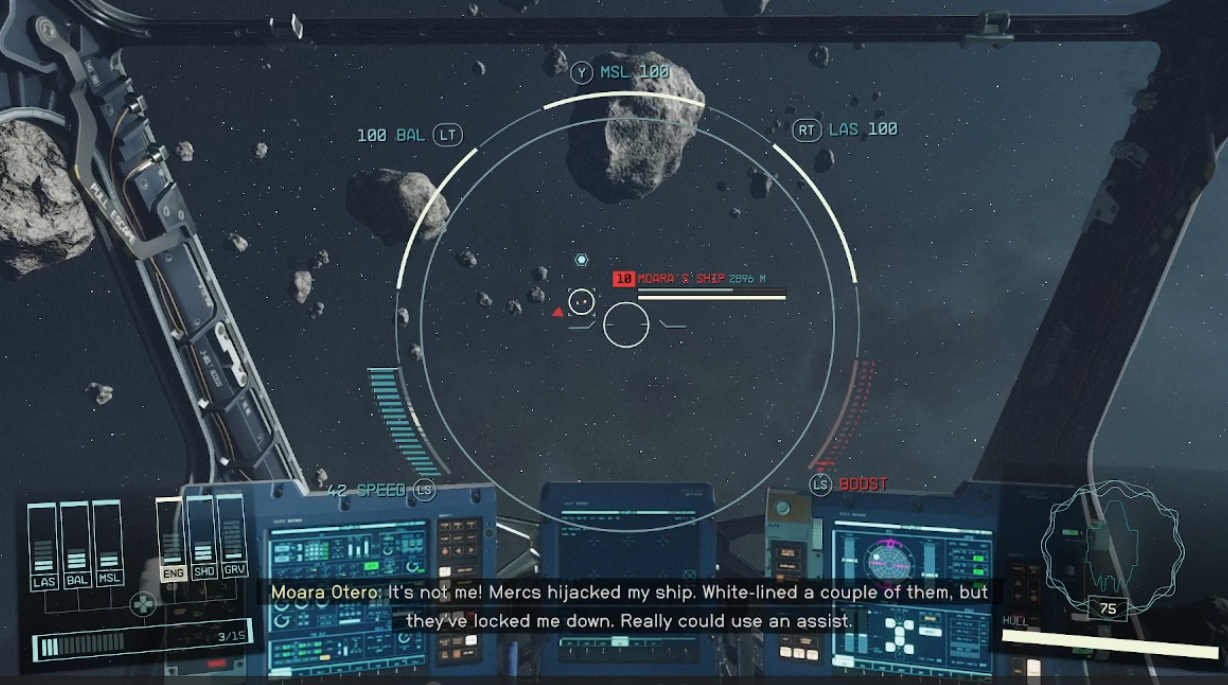
*After you damage it enough, [[Moara]] will message you saying that their [[ship]] has been hijacked by Mercs and he needs assistance. | |||
[[File:Starfield_OldNeighborhoodMoaraHijack_EN.PNG|400px]] | |||
=== | ===Evade Fire=== | ||
*Avoid being damaged while being fired upon by the [[ship]]. | |||
*You can find tips on Star[[ship]] combat in our article: Combat - Starships - Starfield | |||
=== | ===Damage Moara's Ship=== | ||
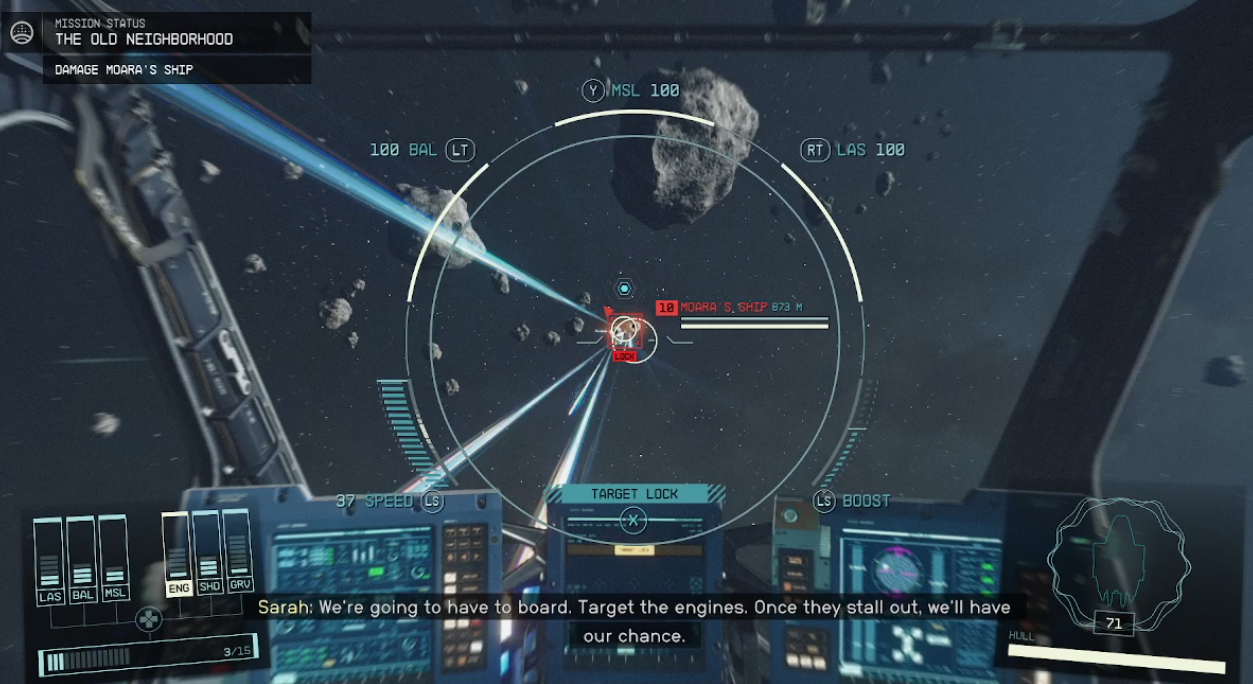
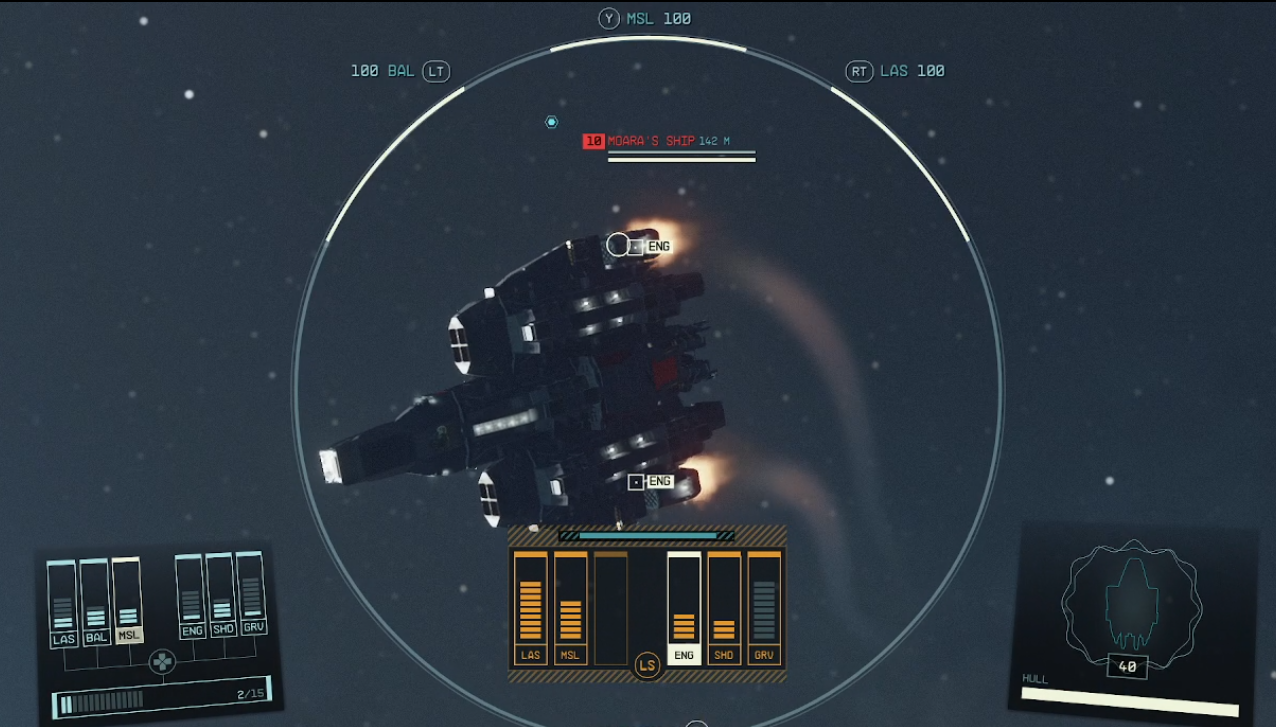
*Target the engines of the [[ship]] and fire on the [[Engines]] after locking onto the ship and picking the Engines. | |||
[[File:Starfield_OldNeighborhoodDamageShip_EN.PNG|400px]] | |||
[[File:Starfield_OldNeighborhoodTargetEngines_EN.PNG|400px]] | |||
=== | ===Dock with Moara’s Ship=== | ||
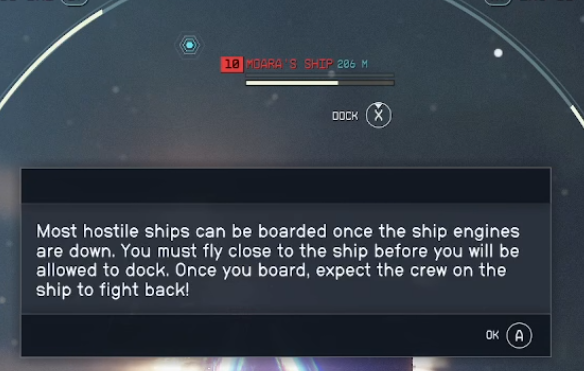
*After you damage the engines enough, stay in targeting mode to [[Dock]] with [[Moara]]'s [[ship]]. | |||
** If you exit out, get back within 500m of the ship to "Dock" with it. | |||
[[File:Starfield_OldNeighborhoodDockShip_EN.PNG|400px]] | |||
=== | ===Clear Moara's Ship of Hostiles=== | ||
*Once docked, "[[Board]]" the [[ship]] and open the door straight ahead. | |||
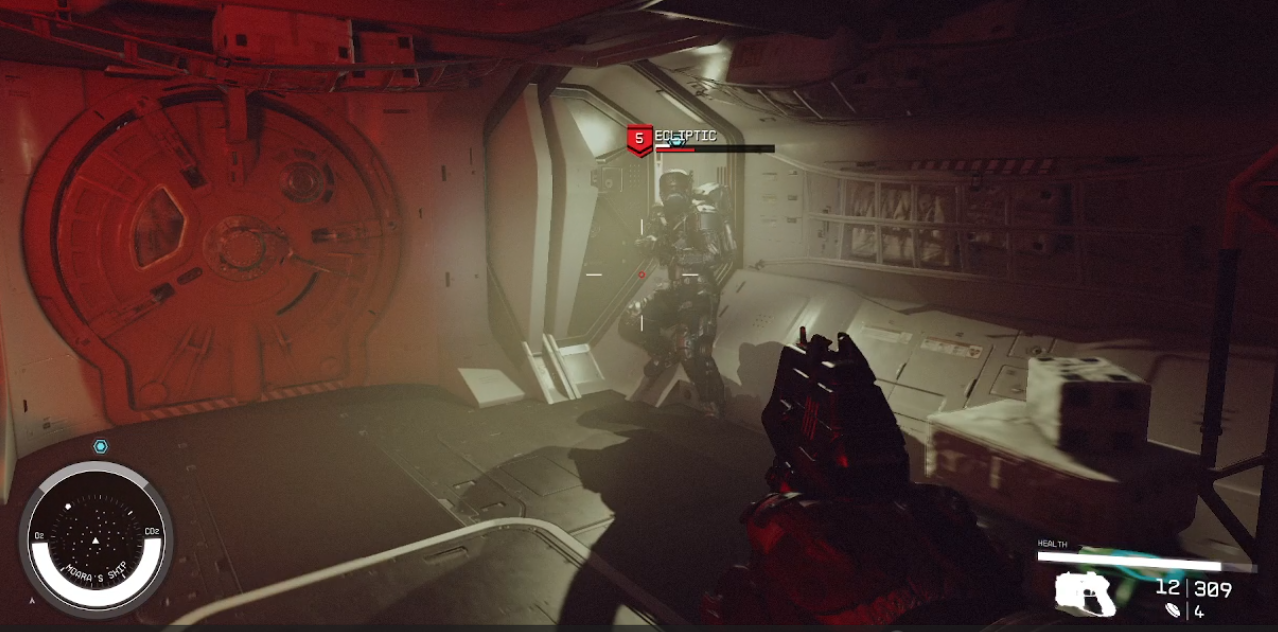
*You will be attacked by [[hostile]] Ecliptic [[enemies]]. | |||
*Kill all [[enemies]] you come across. | |||
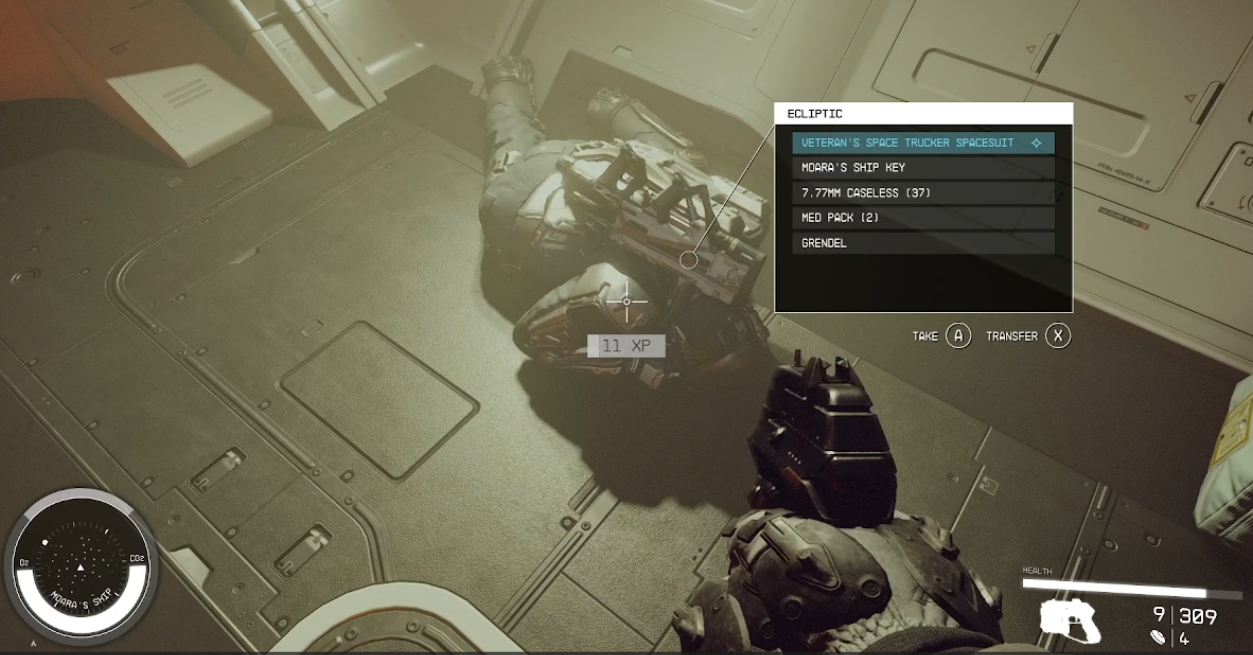
*The final Ecliptic will have a key that you need to loot. | |||
[[File:Starfield_TheOldNeighbhoodEcliptic_EN.PNG|400px]] | |||
[[File:Starfield_TheOldNeighbhoodShipKey_EN.PNG|400px]] | |||
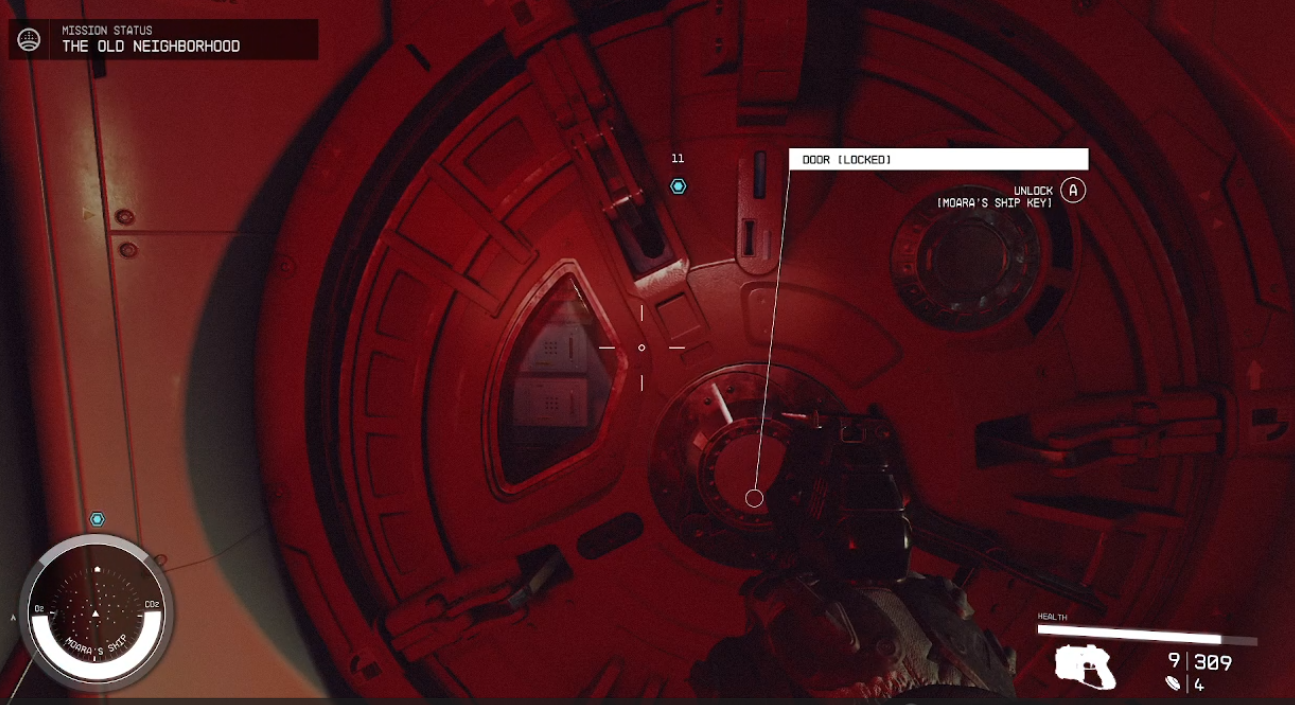
*Use [[the Key]] to unlock the red door. | |||
[[File:Starfield_TheOldNeighbhoodUnlockDoor_EN.PNG|400px]] | |||
=== | ===Talk to Moara=== | ||
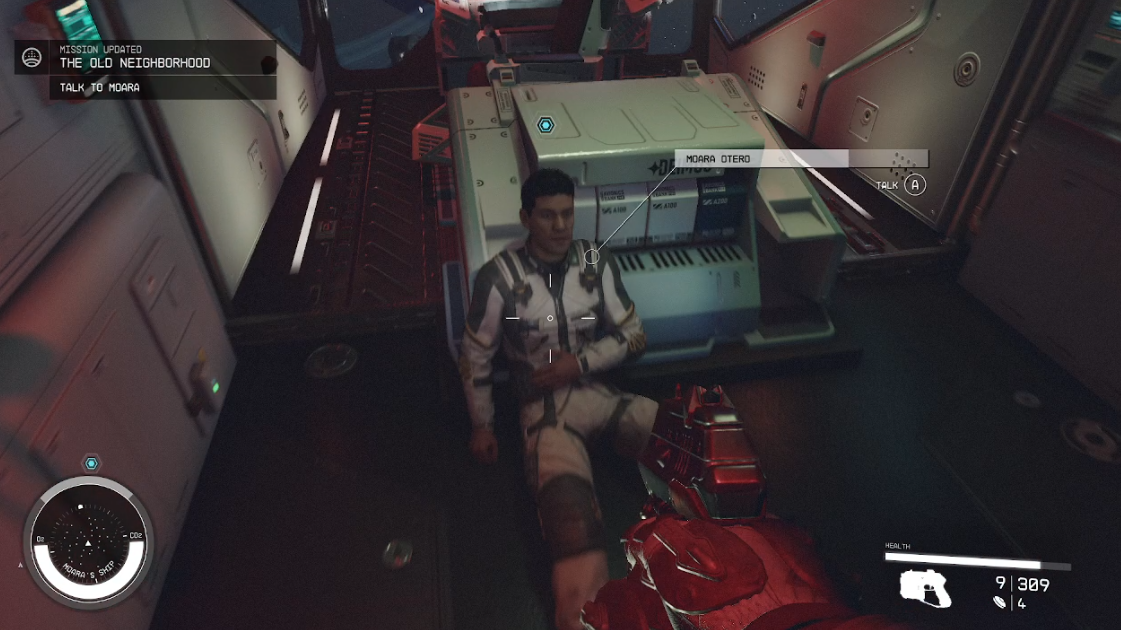
*[[Moara]] is on the floor near the front of the [[ship]]. Talk to him for your next objective. | |||
[[File:Starfield_TheOldNeighbhoodMoara1_EN.PNG|400px]] | |||
=== | ===Take the Artifact=== | ||
*Grab the artifact from behind [[Moara]]. It's in the front of the [[ship]] if you get turned around. | |||
[[File:Starfield_TheOldNeighbhoodTakeArtifact_EN.PNG|400px]] | |||
=== | ===Return to the Lodge=== | ||
*Exit the [[ship]] the way you came to get back on your own ship. | |||
*Undock from [[Moara]]'s [[ship]]. | |||
[[File:Starfield_UndockShip_EN.png|400px]] | |||
*Open your Mission Log and Set Course/Travel to [[the Lodge]] | |||
=== | ===Add the Artifact=== | ||
*Once you enter [[the Lodge]] in [[New Atlantis]], wait for [[Sarah]] and you'll be prompted to add the [[Artifact]]. | |||
[[File:Starfield_OldNeighborhoodActivateArtifact_EN.png|400px]] | |||
=== | ===Wait for Sarah=== | ||
*[[Sarah]] will discuss various aspects of the [[Artifact]]. | |||
=== | ===Talk to Sarah=== | ||
*At this stage, [[Sarah]] will give you your reward for completing the [[mission]] and welcome you to [[Constellation]] as a full member. | |||
*[[Sarah]] will ask if she can join you. You can now add Sarah to your [[Companion]] list. | |||
==Additional Information== | ==Additional Information== | ||
Latest revision as of 00:09, 13 September 2023
| The Old Neighborhood | |
|---|---|
| |
| Information | |
| Type | Main Mission |
| Number | 2 |
| Location | the Lodge |
| Starting NPC | Sarah Morgan |
| Description | Sarah wanted to talk to me about my first mission. "We need to find Vanguard Moara, who might be in possession of an Artifact. He was last seen patrolling the Sol System." |
| Reward | 400 XP, 8000 Credits, Constellation Space Suit, Constellation Space Helmet, Sarah Morgan as Companion |
| Previous Mission | One Small Step |
| Next Mission | The Empty Nest, Into the Unknown, Back to Vectera |
| Patch | 1.0 |
The Old Neighborhood is the mission 2 of Main Mission.
Walkthrough
In the mission "The Old Neighborhood," you start by equipping your character and reviewing your skills. You then approach Sarah Morgan, who is standing beside the artifact pedestal in the Lodge. If you're ready to embark on the mission, talk to her. She'll join your party, becoming a permanent member until the mission's end. While still at the Lodge, don't forget to grab the Constellation Guide 01 magazine from the railing for a permanent buff.
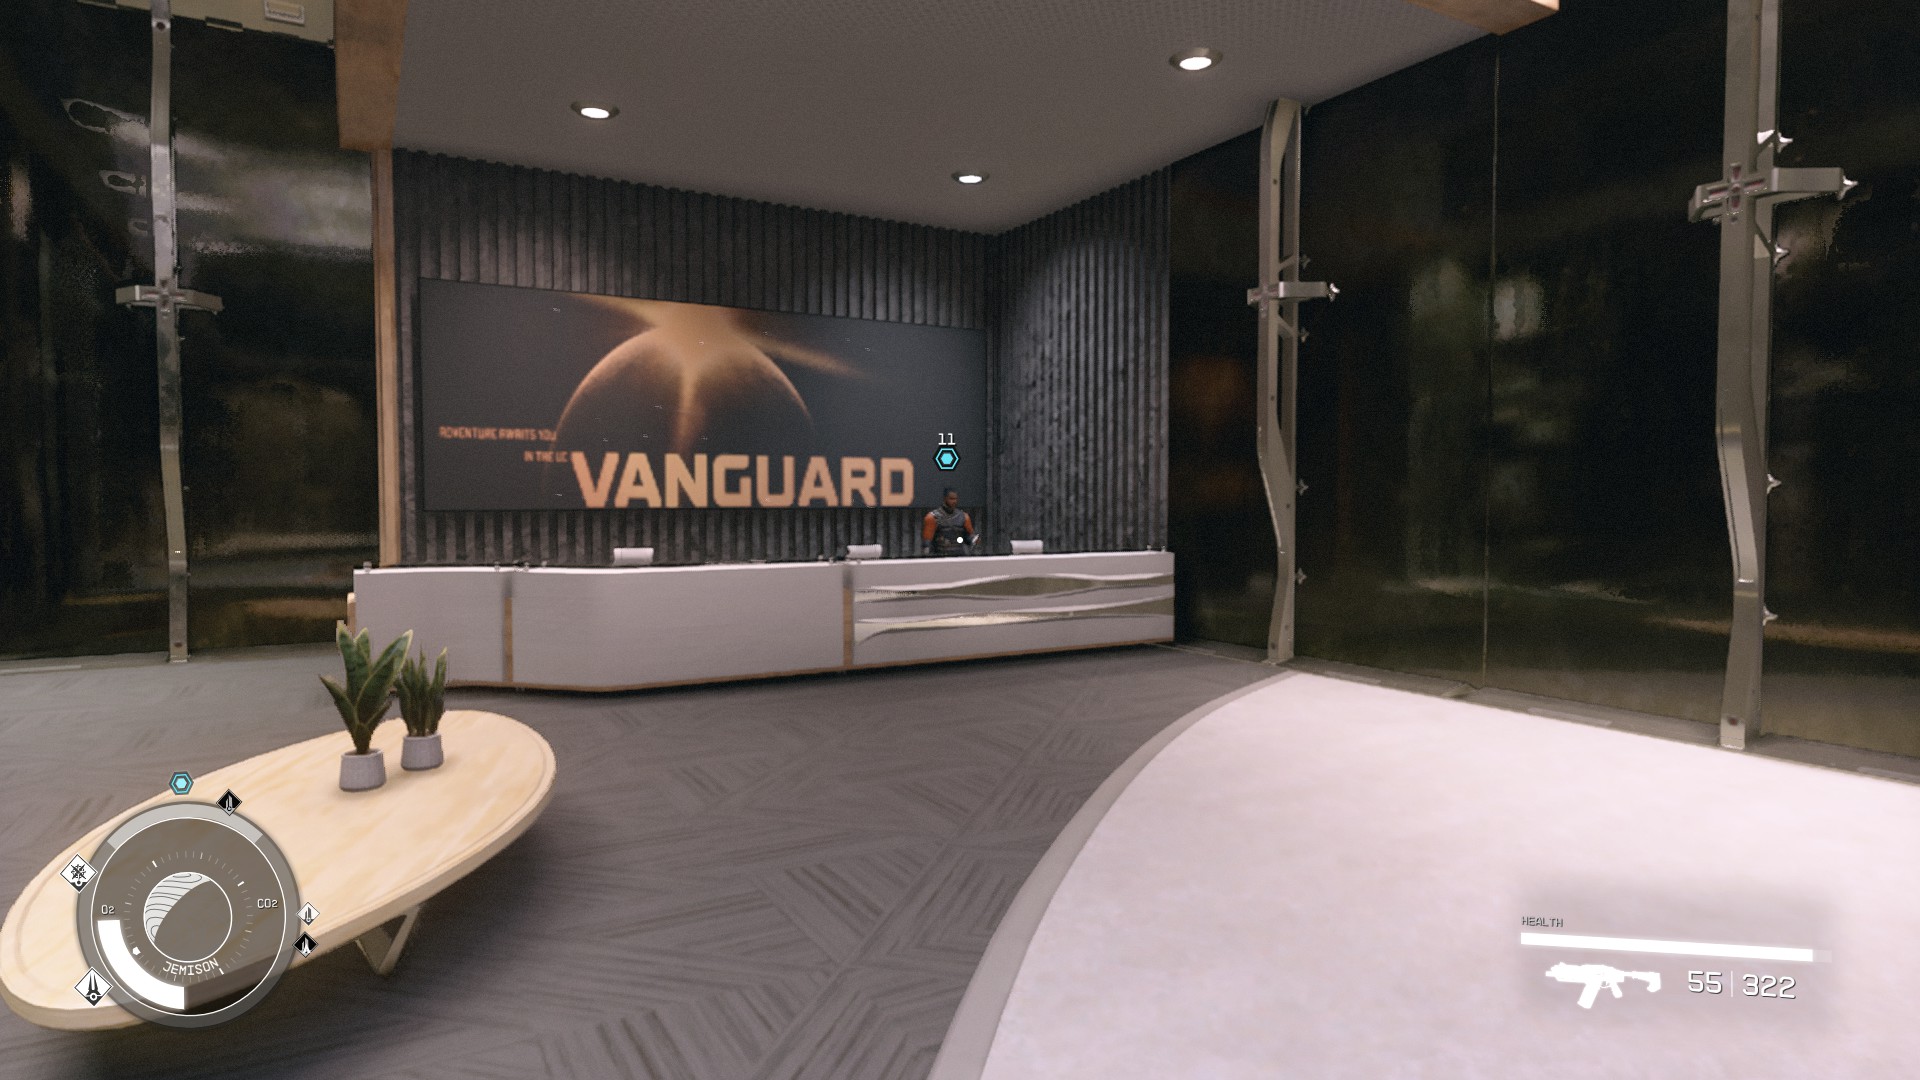
Your first objective is to talk to Sarah's contact, Commander John Tuala. Exit the Lodge and follow your in-game map to locate him. During the conversation, you'll have the option to join the UC Vanguard; the choice is yours.
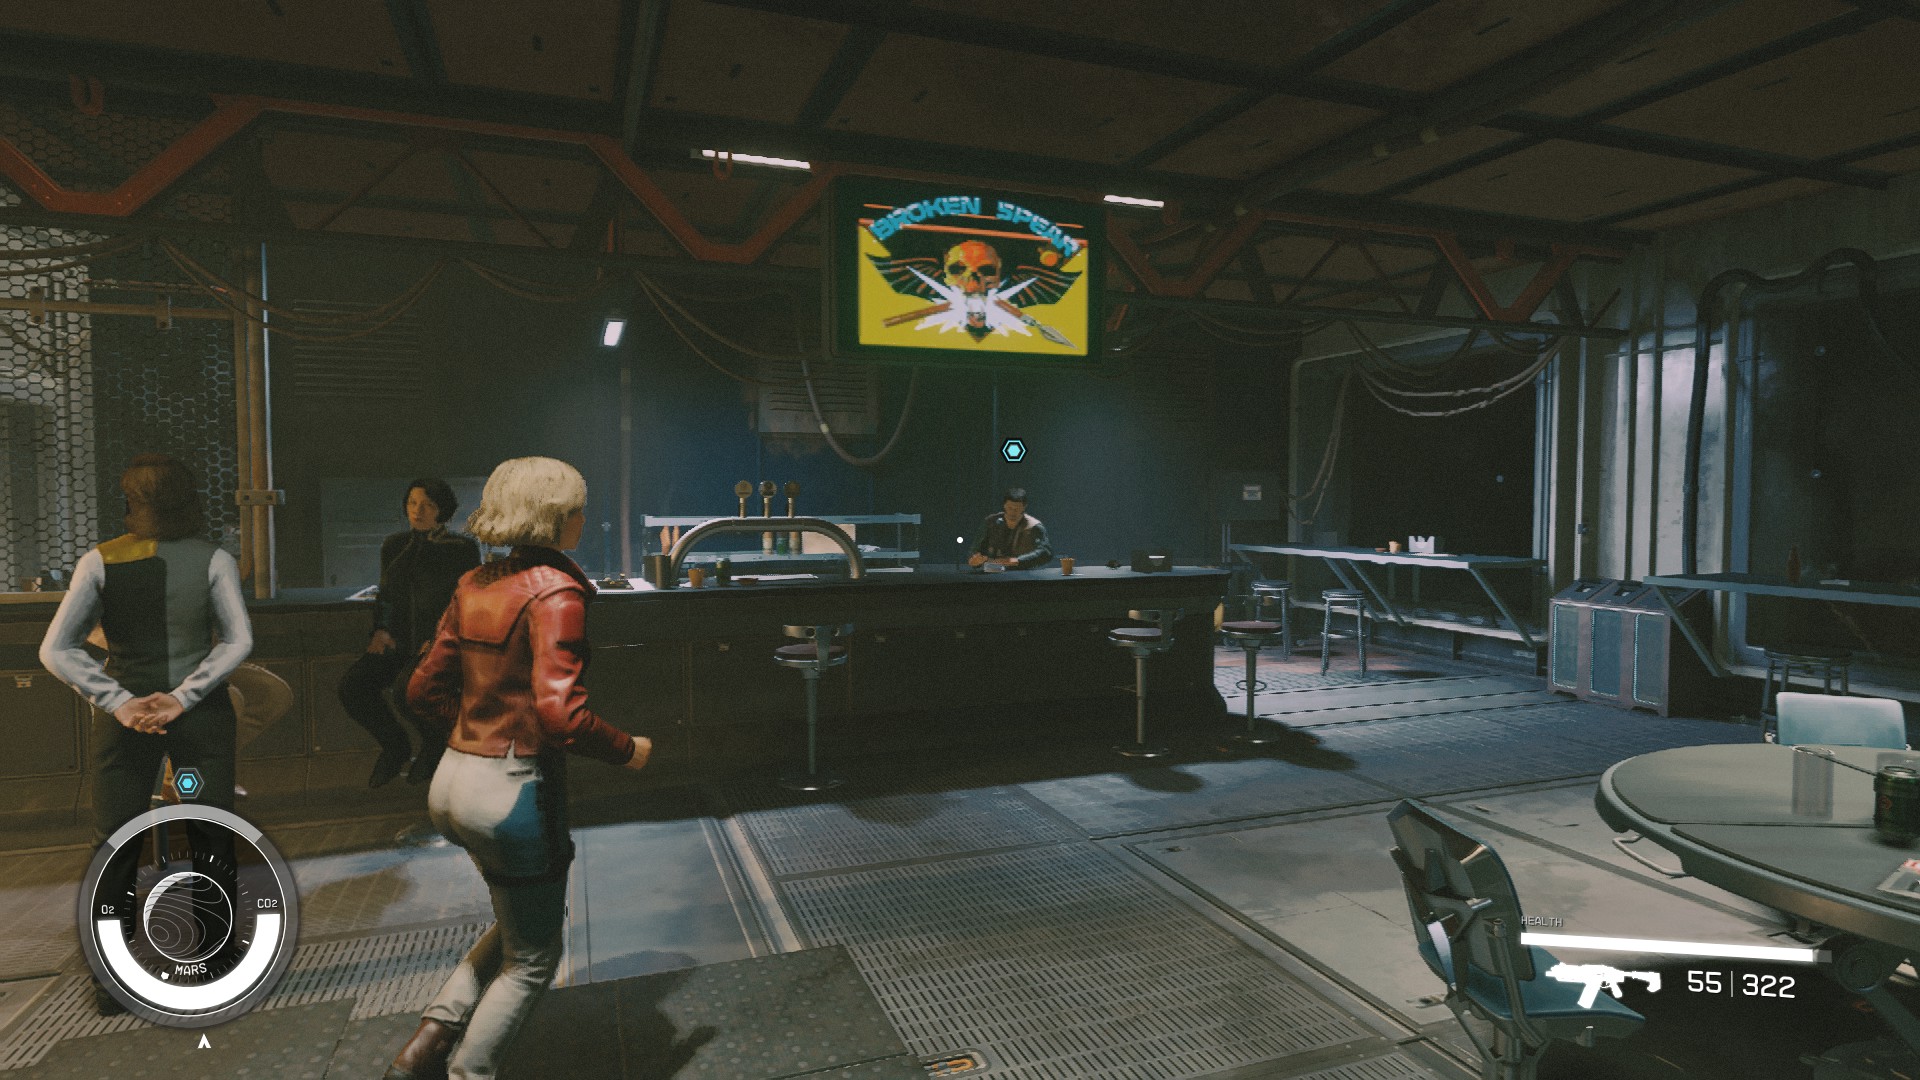
Upon obtaining new information from Commander Tuala, you're instructed to travel to Cydonia on Mars. Use the Starmap to locate Mars in the Sol system and initiate the jump. Once you arrive, land in Cydonia and navigate your way to the mining colony. Inside, take a right turn to find the Broken Spear bar. Speak with Jack, your new contact. Through a Companion-specific dialogue option, you can use Sarah to call out Jack's dishonesty, dropping his asking price for information from 2500 Credits to a mere 1000. He also directs you to the Mission Board for extra jobs, if you're interested.
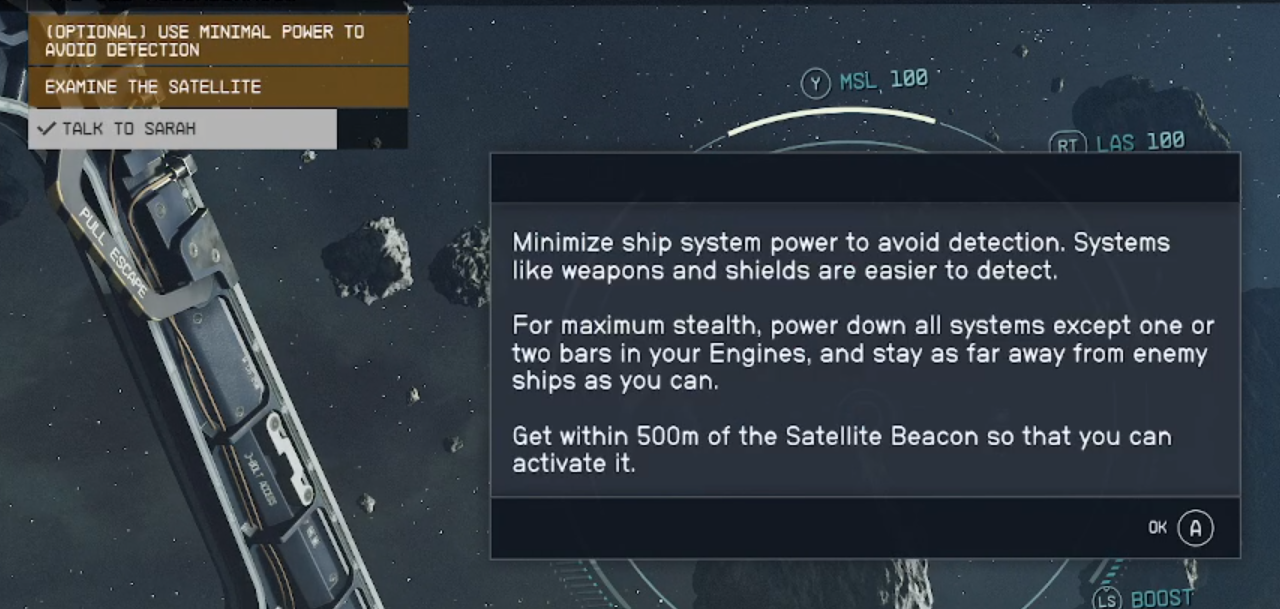
Armed with new information, set course for Venus, also located in the Sol system. Upon arrival, Sarah will alert you to hostile ships nearby. Best heed her advice and avoid them. Then, set your ship systems to level 0, except for the engines which should be at 2, and carefully approach the satellite to interact with it.
Your next destination is the Nova Galactic Staryard, orbiting Earth's moon. Once you arrive, Sarah will brief you on the significance of the Staryard. Approach the docking point and hold "/R" to dock automatically.
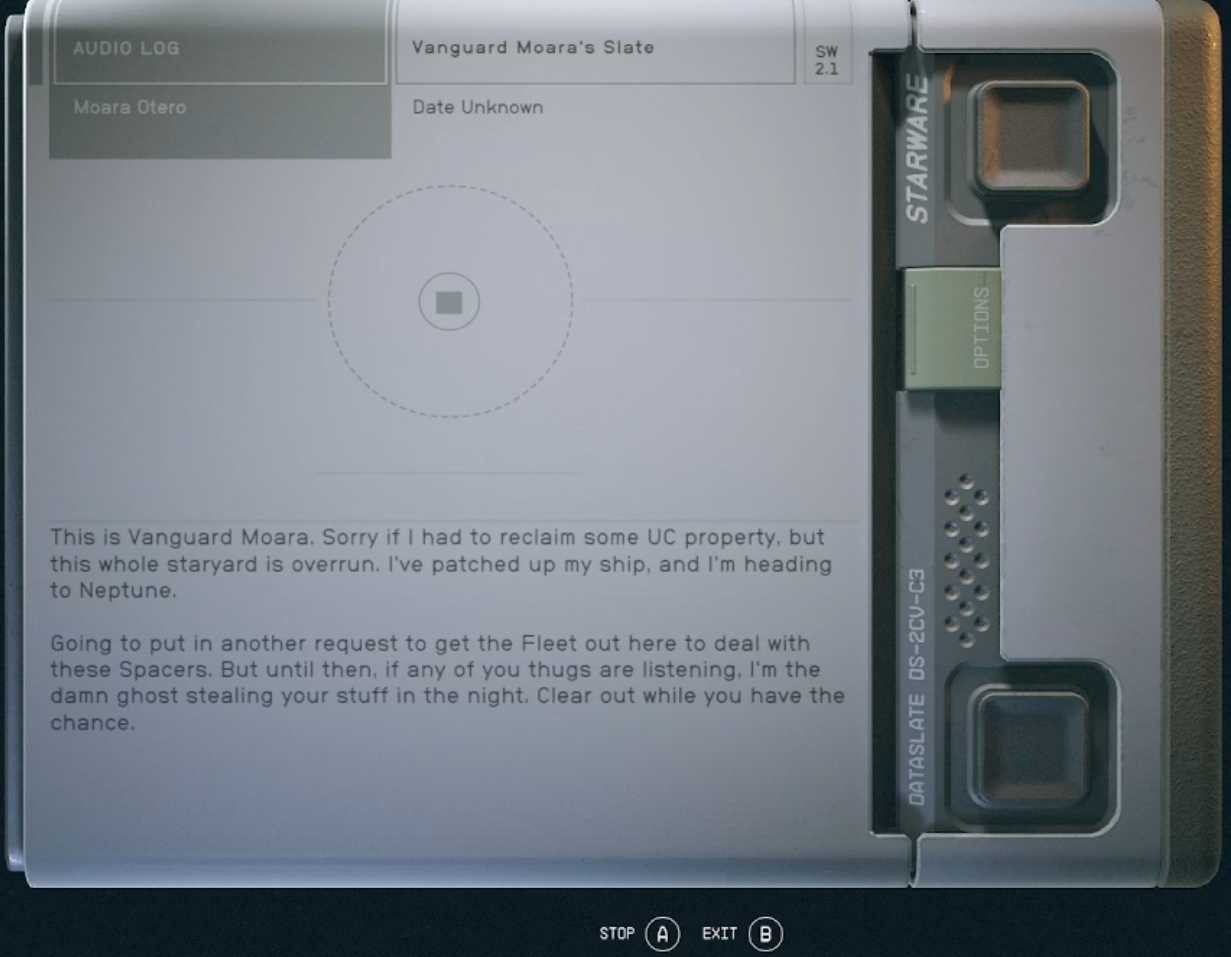
Once inside, explore cautiously. There are more hostiles here than in the previous mission. Watch for a large room labeled "Conference Room" where two factions, the Spacers and Eciptics, are in a firefight. A Search and Rescue key leading to loot is found here. Continue toward the objective until you reach a room with a staircase; here you'll find another magazine, the Nova Galactic Manual 02. Secure it and proceed into the objective room, dealing with any opposition. Inside the white structure, you'll find Vanguard Moara's Slate on a bench.
After gathering all the intel, it's time to head to Neptune. Once back in space, locate Neptune in the Sol system and jump. Once you arrive, Moara's ship will be visible nearby. However, as you approach, the ship turns hostile. Navigate evasively while dialogue ensues. You'll need to disable the ship by taking down its shields with your laser weapon and then hitting it with your ballistic weapon. Get close enough, and you can dock with Moara's ship.
Prepare for combat as you board Moara's ship. After clearing out the enemies, loot the cockpit key from the last one. Then proceed to the cockpit to talk to Moara and understand the situation. You'll find an artifact at the front right of the cockpit—take it.
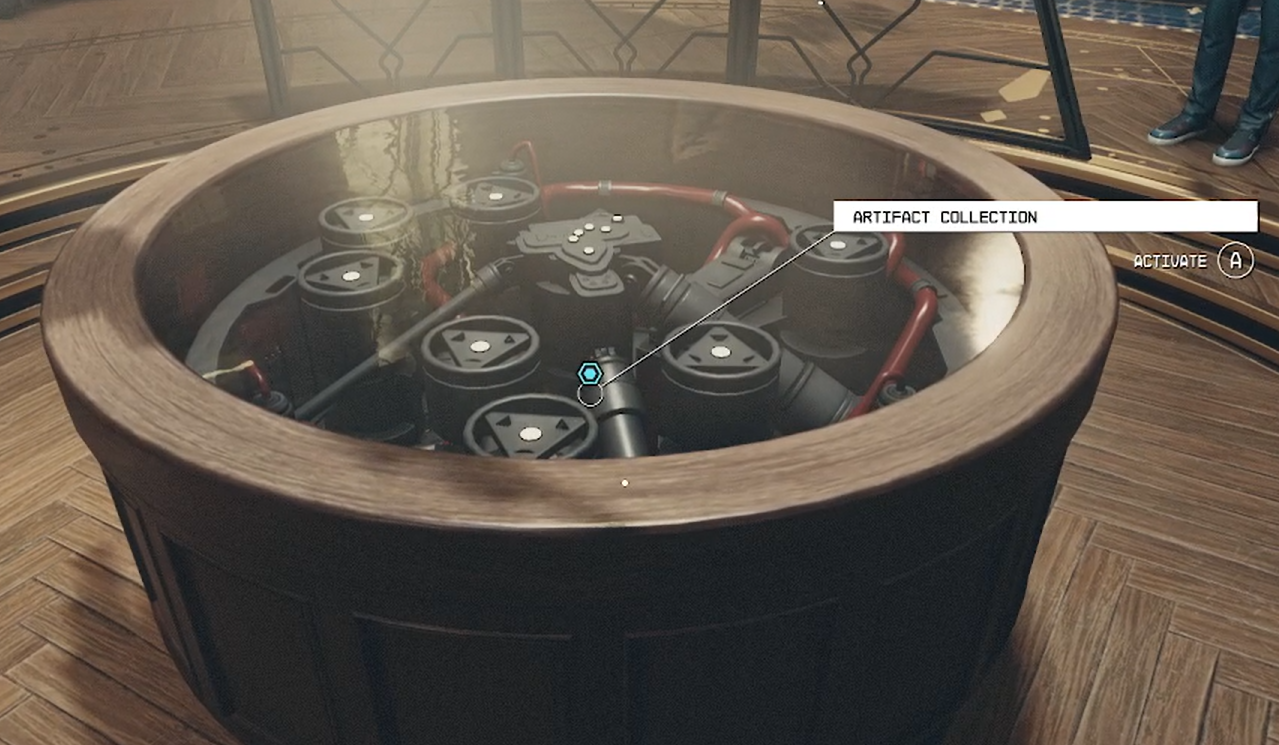
Return to the Lodge on Jemison, docking and adding the artifact to the pedestal. Wait for Sarah to consult with Noel about the artifact pieces. Finally, talk to Sarah one last time to complete the mission. With that, you're one step closer to unraveling the game's mysteries.
Tips and Tricks
- Highly advise doing Into the Unknown before doing Back to Vectera and Empty Nest.
- You can use Sarah to carry items for you throughout the mission to help with how much you can carry.
- There are several areas in this mission where you will be attacked. Make sure to keep your health up and restore your shields on your ship.
- Don't forget to Undock/Dock your ship when you want to leave or you won't be able to fast travel.
- You will obtain your first Constellation Companion in this mission
Objectives
Talk to Sarah
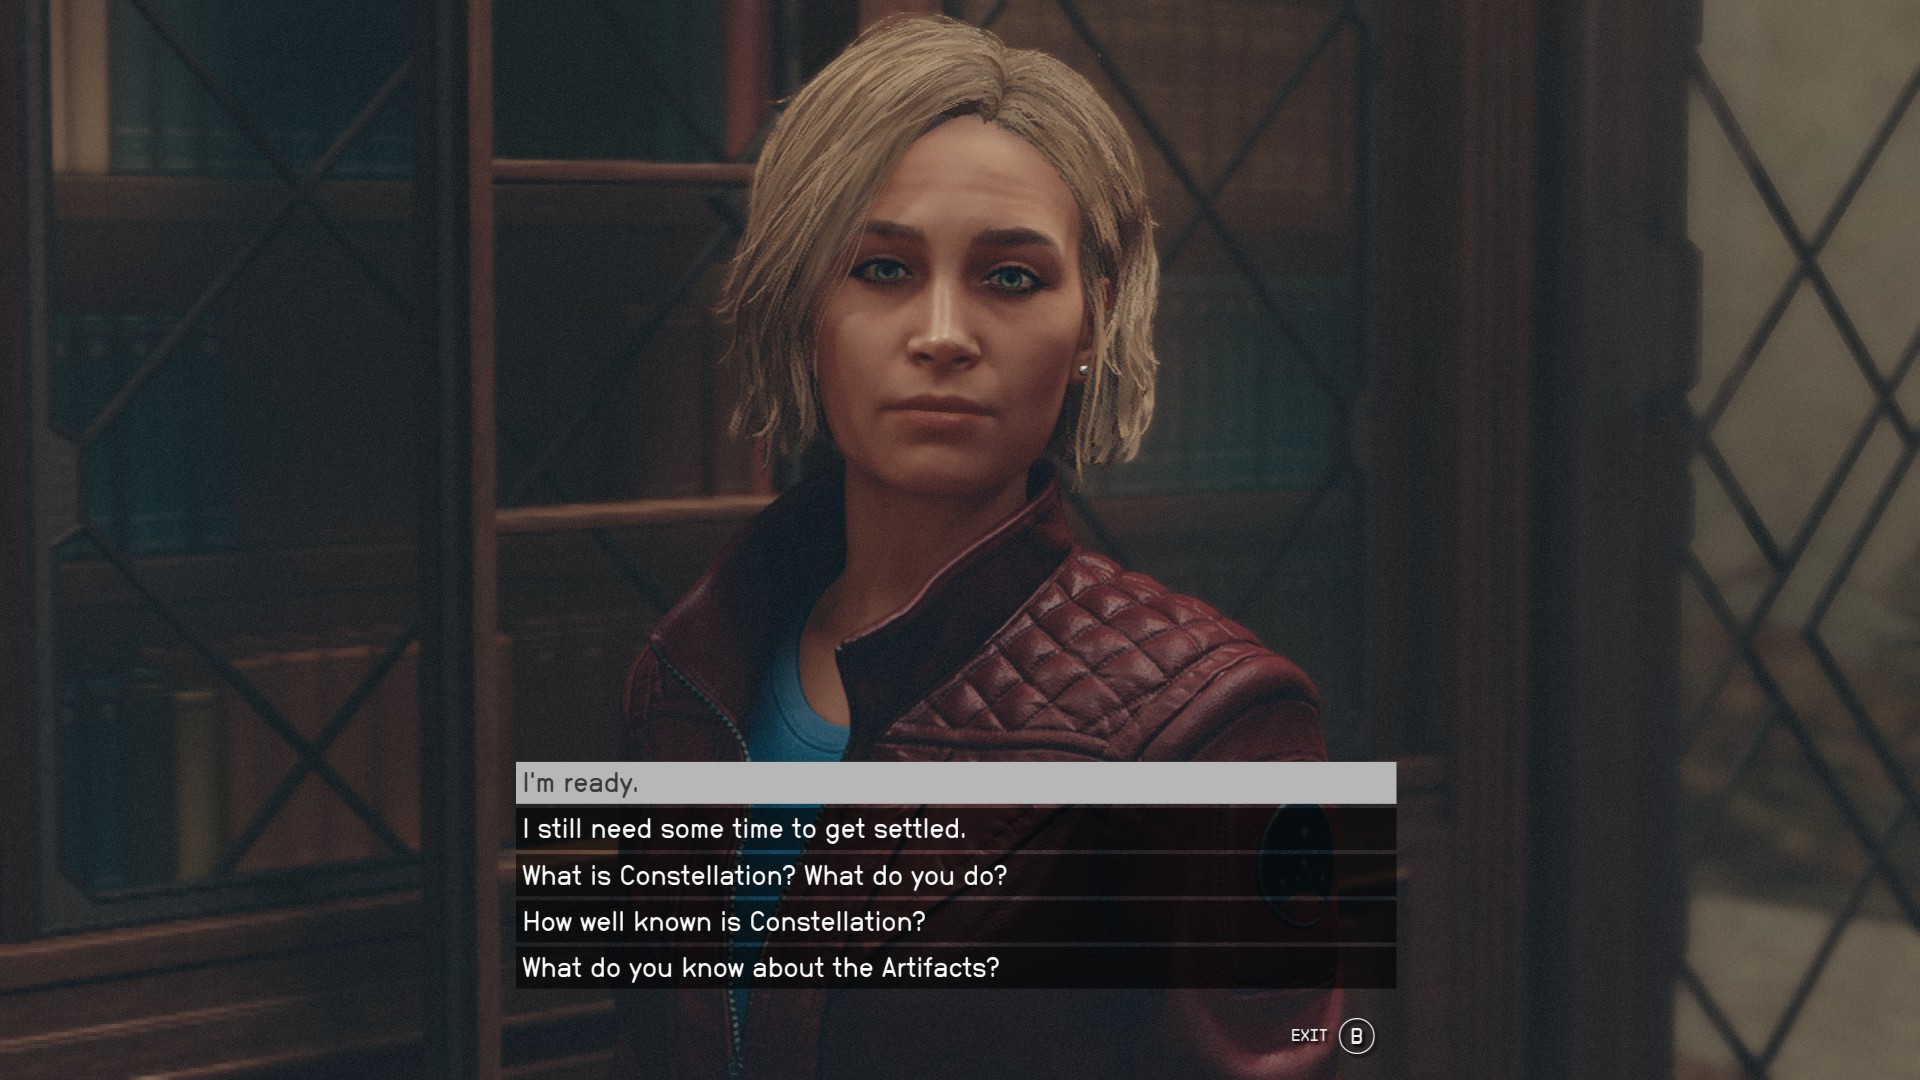
- Go into the Lodge in New Atlantis.
- Talk to Sarah to get your next step.
- Select "I'm ready" to continue the quest.
Talk to Sarah's Contact
- Follow the quest marker to the Vanguard.
- Speak with Tuala.
Ask about Moara in Cydonia
- Return to your ship and travel to Sol.
- Travel to Cydonia.
- Follow the quest marker to a bar, make sure to turn right at the 4 way intersecting hall.
- Talk to the bartender.
- Moara owes a tab at the bar. You can either pay the tab or persuade the bartender to not need that to give you the information.
Go to Venus
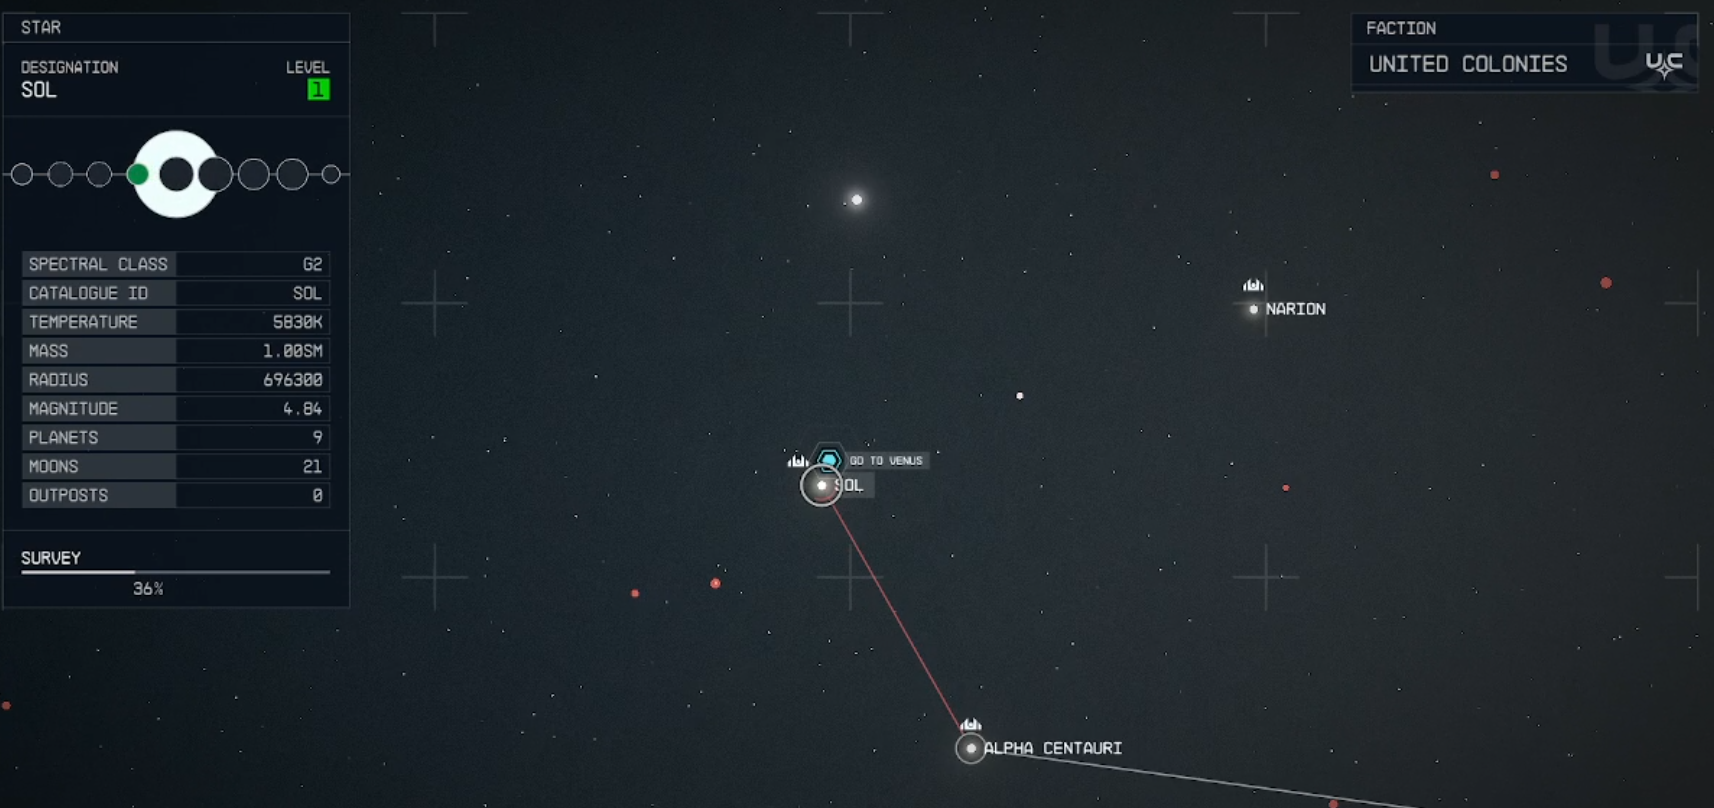
- Open the Mission log and select "Set Course" and select the "Sol" System and travel to Venus.
- You may need to jump to a closer location before jumping to Venus.
Talk to Sarah
- When you arrive at Venus, Sarah will talk to you about how you need to get to the Satellite to get information.
Examine the Satellite
- Optional: Use Minimal Power to Avoid Detection.
- If you choose this option, turn all systems down except one or two bars for your Engines and stay far away from the enemy ships. Get within 500m of the Satellite Beacon to activate it.
- If you choose to not do the optional method, fight off the Va'ruun Hymn ships. Once once they are destroyed, go to the Satellite Beacon to activate it.
Go to Nova Galactic Staryard
- The Satellite Beacon will relay the message that Moara Otero has headed to the Nova Galactic Staryard orbiting Earth's Moon.
- Open your Mission log and "Travel" to Earth.
Talk to Sarah
- Sarah will tell you about Earth's history and you want to select "Let's see if Vanguard Moara is in that staryard"
- Sarah will prompt you to dock with the Nova Galactic Staryard
Dock with Nova Galactic Staryard
- Dock your spaceship with the Nova Galactic Staryard
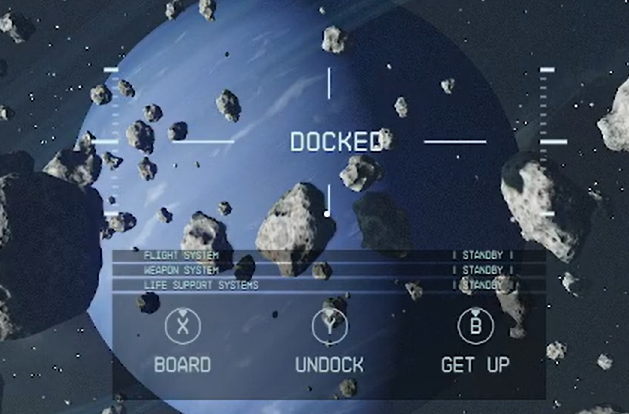
- To Dock: hover over the white diamond and enter your Scanner and when prompted, choose the "DOCK" option.
- Exit your ship and go through the next room and open the door for the "Nova Galactic Staryard"
Find any clues about Moara
- If you get lost, open your scanner and look for the white arrows that will point you in the direction you are supposed to go.
- Note: Sometimes, these will not show if you are in certain areas.
- This next area is full of enemies that you can kill or stealth past. (Spacers, Ecliptics)
- Follow the marker until you get to a room with a table that has Vanguard Moara's Slate on it.
- Listen/Read the Vanguard Moara's Slate
Go to Neptune
- Before you are able to travel to Neptune, make sure to undock from the Nova Galactic Staryard.
- Fast Travel to Neptune and Sarah will mention that there is a ship drifting.
Approach the Ship
- As you approach the ship, it will turn hostile. Shoot it.
- After you damage it enough, Moara will message you saying that their ship has been hijacked by Mercs and he needs assistance.
Evade Fire
- Avoid being damaged while being fired upon by the ship.
- You can find tips on Starship combat in our article: Combat - Starships - Starfield
Damage Moara's Ship
- Target the engines of the ship and fire on the Engines after locking onto the ship and picking the Engines.
Dock with Moara’s Ship
- If you exit out, get back within 500m of the ship to "Dock" with it.
Clear Moara's Ship of Hostiles
- Once docked, "Board" the ship and open the door straight ahead.
- You will be attacked by hostile Ecliptic enemies.
- Kill all enemies you come across.
- The final Ecliptic will have a key that you need to loot.
- Use the Key to unlock the red door.
Talk to Moara
Take the Artifact
Return to the Lodge
- Open your Mission Log and Set Course/Travel to the Lodge
Add the Artifact
- Once you enter the Lodge in New Atlantis, wait for Sarah and you'll be prompted to add the Artifact.
Wait for Sarah
Talk to Sarah
- At this stage, Sarah will give you your reward for completing the mission and welcome you to Constellation as a full member.
- Sarah will ask if she can join you. You can now add Sarah to your Companion list.
